

Advice from Eric Prior to secure a bigger bag, and save time, money and frustration
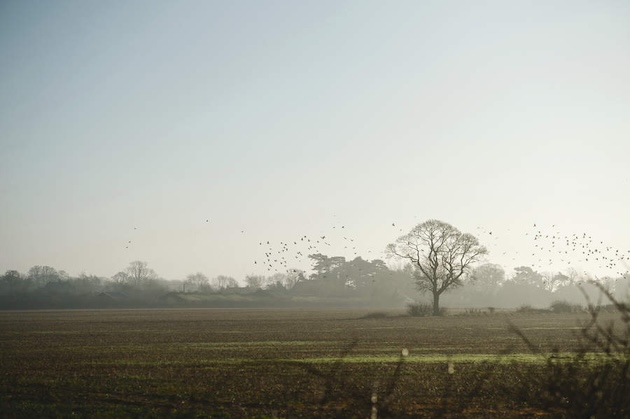
Here are a few of the decoying woodpigeon tips and tricks that I have picked up and perfected over the years. I will stick firmly around the hide, making the task of pigeon decoying easier and less costly. (Read The Field’s pigeon shooting calendar.)
1. Use garden sticks to prop up newly shot dead birds
I use the green garden plant support sticks from garden centres. They are inexpensive and reusable, often lasting for many years. I usually purchase the 15in packs, cutting them in half and sharpening both ends; one end under the chin and forced up into the skull, the other into the ground. Sharpening only at the head end is fine but you will need a point to penetrate sun-baked earth in summer. Never use wire, which is potentially dangerous to animals and could damage farm machinery. (Read: the rules of being a modern pigeon shot.)
2. Use 36in canes in higher crops
Garden centre canes are ideal for use in high crops such as lupin and rape. Make sure that they are stout enough to hold the weight of the bird. The first task is to break the dead bird’s wings so they flap in the breeze. Then sharpen both ends of the cane, sliding the narrowest end into the vent and up through the body and neck and into the skull. Securing into the skull prevents the pigeon from sliding down to the ground. Secure the other end in the ground at about 45 degrees. At this height they are visible above the crop from long distances.
3. Use 18in canes for maximum pulling power
These canes, used in the same way, are perfect for setting up freshly shot birds in shorter crops, such as on newly sown land or on sprouting peas, beans and clover meadows. Once the dead pigeon is secured, I push the stick into the ground until the tail touches the soil.
You do not need to break the wings when using this shorter cane as you are imitating a feeding bird. Try them – you will be amazed at how effective they look among static decoys.
4. Raise your static decoys above the crop
When crops such as peas grow to 6in and more, you can make good use of your cradles. They work well on a still day but can be a pain in a strong wind. You can counter this by turning each static shell decoy on its back. Drill a small hole only just large enough to accommodate the upright spike on the cradles (the holes are best centred between the eyes from underneath). Poke the spike through the hole by holding the decoy in one hand to insert the spike before you place it into position. Setting the cradles into the ground first takes longer as it is more difficult to locate the holes at ground level.
5. Use a glider cradle for extra exposure
If you do not possess a flapper and prefer extra exposure, you can purchase glider cradles inexpensively. These cradles display the bird higher than normal but also include a wing bar. With the wings outstretched the decoy will imitate an incoming pigeon gliding into the killing area.
A word of warning: when using cradles and other metal decoying aids, there is always a chance that you may accidentally leave a cradle or similar item in situ. This could be damaging to farm machinery at harvest time. There are two ways to avoid this: one is to collect the cradles first before taking in the static decoys as it is safer to leave a decoy than a cradle; the other is to bind the cradles and wing bars with coloured electrical tape so you can’t miss them – I do both to be sure.
Without the heavy batteries, rotary and flappers, cradles are ideal, particularly in wet weather when we are forced to abandon the 4×4 and carry kit across a muddy field. (Read: The rules of being a modern pigeon Shot.)
6. Building a hide
We need to disguise our location just enough not be recognised – the aim is to see clearly but not to be seen. Most of the hides that I see, whether made of natural materials or camouflage netting, have the same fault: too much cover. Certainly, the occupant can’t be seen, which is good, but he/she cannot see the approaching pigeon.
Some guns look over the top, which is fine if they are seated in the shade but if not it will cause the birds to divert away. Other decoyers make holes to spot the incomers. This is a mistake as they will miss many opportunities as the pigeon approach from other directions. They will also miss a high percentage of shots that are taken in panic at the last moment.
So what are we looking for when erecting a hide? Whatever it is, it must disguise our shape, rendering us unrecognisable as a human predator but, at the same time, allowing us to see pigeon approaching from all directions.
Camouflage nets are light, easy to transport and simple and quick to erect. On the downside, they are usually dense, making it difficult to spot incoming birds, and it will give most of us a headache staring through netting all day. To rectify this, I extend the height by fixing a 9in-wide piece of see-through camouflage mesh secured at 6in intervals with short black cable ties along the length of the netting.
7. The two-part hide
This allows me to sit with a clear view from all angles without peering over the top. Pigeon do not see me, allowing a smooth, unrushed shot from the sitting position without the bird flaring off in panic before I fire.
8. Use crocodile clips for fast and simple hide erection
When using mesh material it is best to employ crocodile clips to secure the net to the poles. This is quick but also allows you to adjust the height and tautness quickly after the hide has been erected.
9. Choose a well-designed and comfortable seat
Forget standing up, sitting on oil drums, milk crates and similar objects. We need to be comfortable for the long hours spent in all weathers in a hide. It is best to use a folding pigeon seat with a back rest and spinning seat to enable you to rotate from left to right, and vice versa, without effort for accurate shooting. It must also be the correct height, especially when you need to stand to take that second shot. Therefore, one with adjustable height is a big plus.
10. Safety first
Safety in and around the hide is paramount. Many ramblers and local dog walkers, for example, do not always take notice of footpath signs and so may approach your hide unseen and be startled by your gun fire. Or, if they spot your decoy pattern they may wonder whether to proceed or not. To prevent any confusion, I use warning posters stationed on the rights of way, or any other possible entrances to the field. Often one each side of the field is sufficient but, at other times, I will position as many as five.
Farmers appreciate this and since using them I have not received a single complaint. Walkers also appreciate this and often stop to express their approval. They are also more likely to chat, which, to my mind, goes a long way to improving their understanding of country life.
Another useful tip, while we are on the subject of safety, is that before approaching a fellow gun in the hide, make sure that he/she is aware of your presence by way of a shout or mobile phone call. This could well prevent you being on the receiving end of a low shot as your friend gives full concentration to that incoming low pigeon.
This article was originally published in 2014 and has been updated. For more in-depth articles on pigeon shooting subscribe to The Field monthly Guide To newsletters here. If you buy something, we may earn an affiliate commission. Learn more https://www.futureplc.com/terms-conditions/